IRIS4 La Marzocco智能套件 S3 Remote · C3 Dosing Chip

IRIS4 GUIDE

Shot-Dosing PCBA Non-Destructive Installation Guide

PCBA adapter installation, Bluetooth scale pairing, target-yield setup, and first-shot validation notes for La Marzocco Micra users.

This guide is adapted from the Micra shot-dosing PCBA installation notes and breaks the field process into steps that are easier to verify. It is for users who already purchased the kit, installers preparing the machine, or support staff checking details remotely.

Installation opens the espresso machine and touches internal wiring. Power the machine off first, keep your hands dry, and avoid letting metal tools touch the control board. If you are not comfortable opening a Micra, ask an experienced installer for help.

1. Prepare Before Installation

  • One La Marzocco Linea Micra, fully powered off.
  • IRIS4 shot-dosing PCBA adapter board, one 4-pin to 4-pin signal cable, and one 2-pin to 4-pin power cable.
  • A BOOKOO or Acaia Bluetooth scale, preferably updated to current firmware.
  • An IRIS4 remote, or the SHOTSTOPPER Companion app, for setting the target yield.

The companion app can be used as a backup target-yield setting tool: Android or iOS. Android usually needs working Google services.

2. Locate the Original Paddle Signal Cable

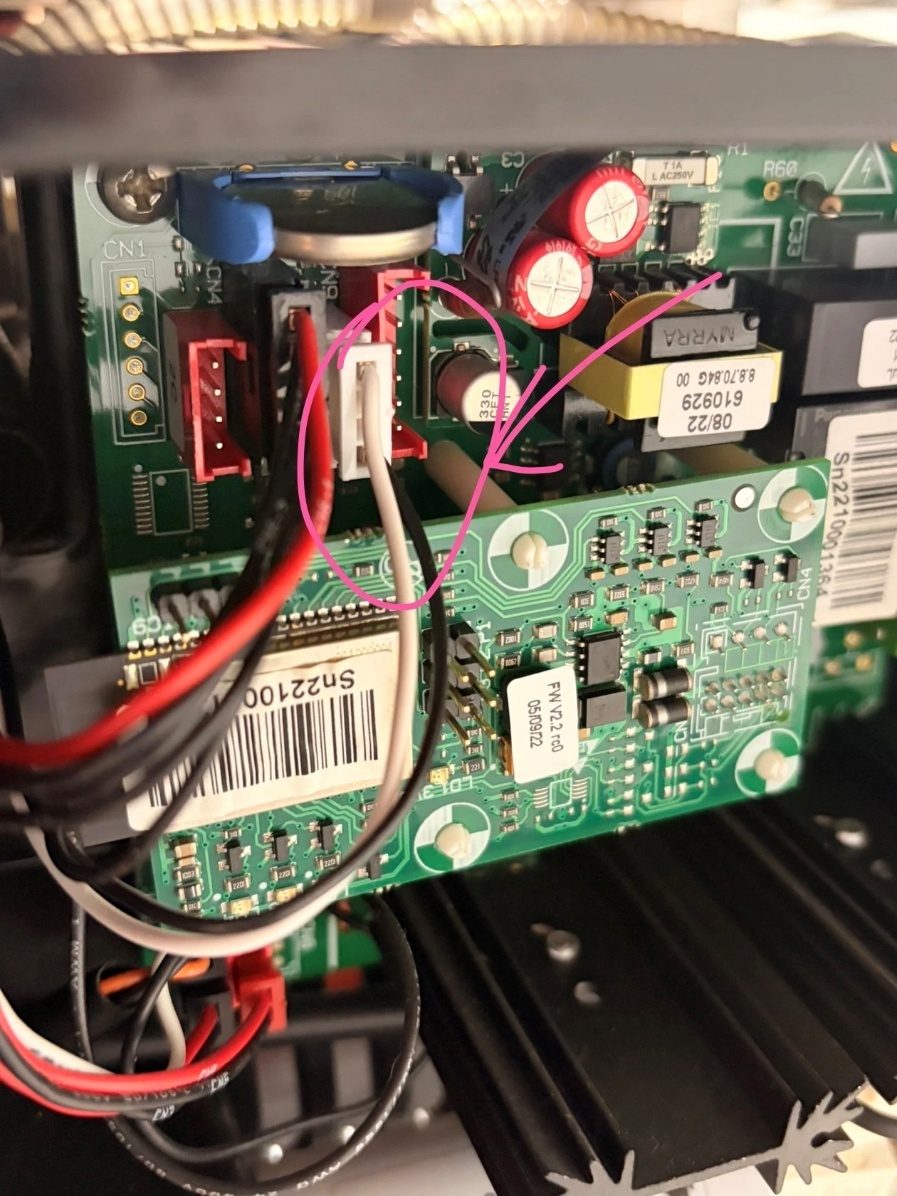
After opening the machine, find the original black-and-white harness connector. It carries the paddle action signal. The PCBA adapter joins this signal path while keeping the original machine behavior available.

Original Micra black-and-white paddle signal connector
Figure 1: Original black-and-white paddle signal connector. Unplug this connector before inserting the adapter board.

3. Connect the Adapter Harness

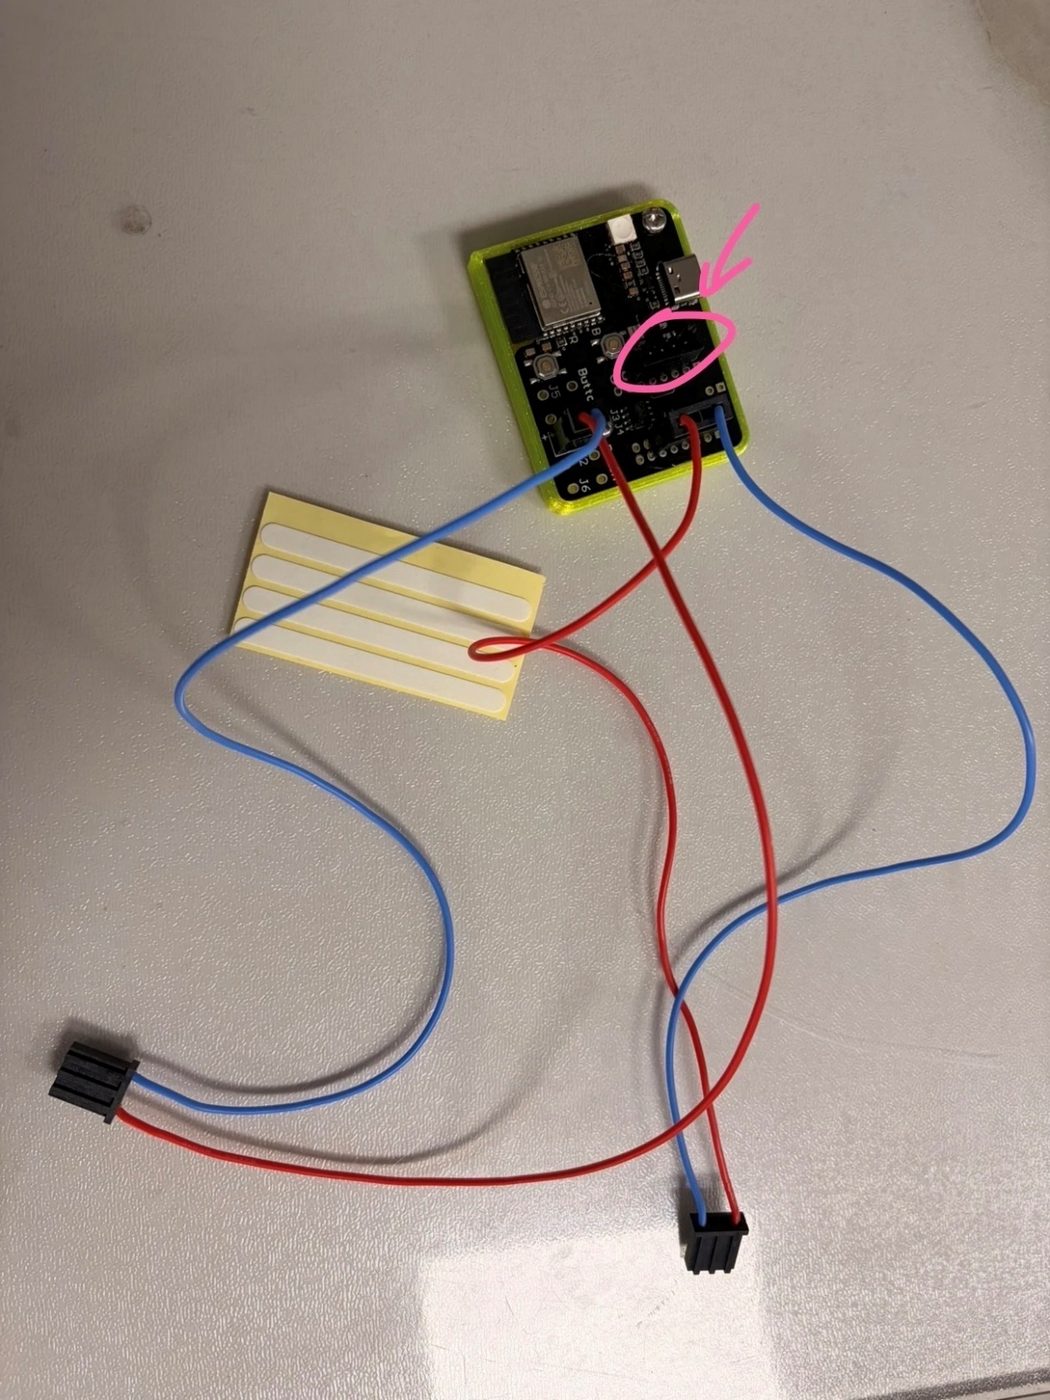
Insert the original black-and-white harness into the adapter connector near the Type-C side. Connect the 4-pin to 4-pin signal cable to the lower connector on the adapter. Connect the 2-pin end of the power cable to the left-side adapter connector.

PCBA adapter power and signal cable layout
Figure 2: Adapter-side wiring. The red-blue cable is power; the black-white signal line reads the paddle state.

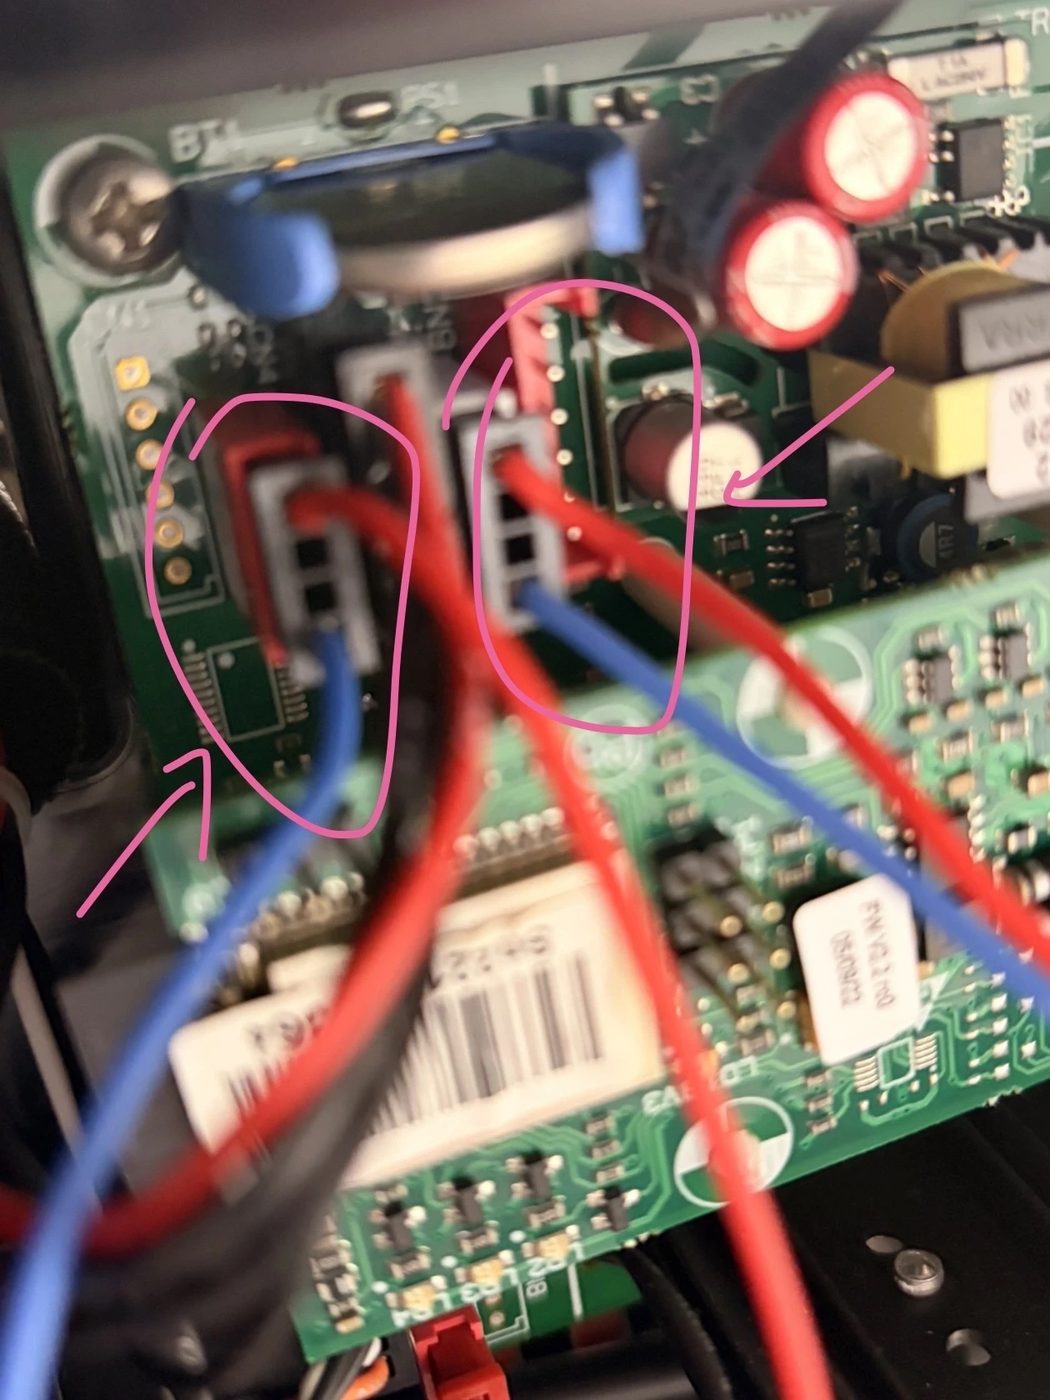
Then plug the 4-pin end of the power cable into the matching machine-side position, and plug the other end of the 4-pin signal cable back into the machine-side signal position. Press both connectors firmly so a loose harness does not interrupt extraction or paddle detection.

Two connector positions after PCBA adapter installation
Figure 3: Two connector positions after installation. Recheck orientation and firmness before powering on.

4. Power-On Test and Target Yield

After powering the machine on, turn on the Bluetooth scale. When the PCBA connects to the scale, the onboard LED state should change. For daily use, set target yield from the IRIS4 remote. If the remote is not available, use the SHOTSTOPPER Companion app as a temporary setting path.

ItemRecommendation
Default targetThe factory target is 37g. Adjust it to your dose and recipe.
Bluetooth scale modeSet BOOKOO scale to two-point timer mode. Wrong mode can trigger the protection flow.
Test methodTest with a prepared portafilter. Empty cups and plain water can distort tare and flow behavior.

5. What Happens During One Shot

  1. Lock in the prepared portafilter, place the Bluetooth scale steadily, and keep the scale surface dry.
  2. Move the paddle left to start extraction. The scale auto-tares and counts for about three seconds.
  3. If another tare happens during those first three seconds, restart the workflow.
  4. Move the paddle back right. The machine continues extraction, and the PCBA stops the shot when target yield is reached.
  5. After the shot ends, wait about three seconds before removing the cup so the scale can settle.

If pre-infusion is enabled, move the paddle back right after pre-infusion ends. During extraction, pressing the scale above the target weight or swiping on the remote shot-curve page can also trigger an immediate stop.

6. Protection Logic and Common Symptoms

SymptomAction
No auto-stop before target yieldCheck scale mode, PCBA LED state, and whether the harness is fully seated.
Wrong scale modeThe device may stop after about 50 seconds in extraction state. Let protection finish, switch the scale mode, then retry.
Very fine grind exceeds 50 secondsProtection may stop early. Grind slightly coarser or improve flow, then test again.
Water on the scale surfaceDry the scale surface to avoid accidental touch-button behavior, tare errors, or connection confusion.

7. Fixing the Board and Restoring the Machine

Only secure the adapter board after paddle detection, Bluetooth scale connection, target-yield stopping, and 50-second protection all behave correctly. Do not block heat dissipation, boiler heat areas, or moving harnesses. Make sure the shell will not pinch any cable before closing the machine.

For daily operation, remote gestures, OTA update, and browser flashing fallback, continue to User Guide, full online manual, and OTA Firmware. To purchase accessories or check delivery, open the Device Store.

Back to User Guide Support